Jul 22, 2022Beginner-12 min
Using Webhooks in ABP Commercial
Why are we using webhook?
Webhooks allow interaction between web-based applications with custom callbacks. The use of webhooks allows web applications to automatically communicate with other web-apps.
Unlike other APIs that poll for data, which means they must check constantly for triggering events, webhooks allow applications to push data from triggering events into other applications as soon as it appears.
This is like getting a notification when something changes in an application, rather than having to check it yourself frequently, which reduces wait time enables real-time data transfer.
The instant transfer of data between applications increases efficiency because you can simply use a webhook in your code to deliver data instead of long running processes or manual checking for changes. Webhooks operate entirely over the internet and so the communication happens in the form of HTTP messages.
Establishing communication between two applications with webhook
Here we connect Twilio (Publisher) and a ABP Commercial web application (subscriber). Webhooks rely on the presence of static URLs which point to APIs in the subscriber ‘s system that must be notified when an event occurs on the publisher system.
In this example, whenever a message is received on a Twilio number, it will push the payload (the SMS Details) to our ABP web application. We can save this payload to our database and perform some database operations based on the data.
Use Case
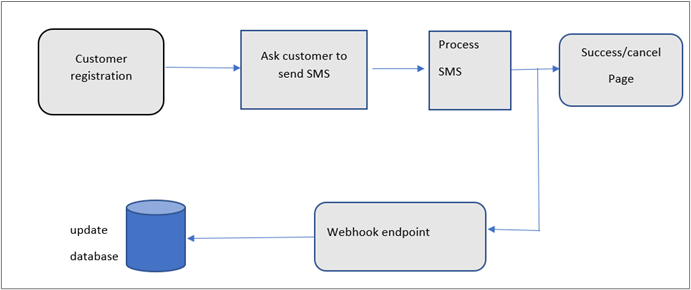
Here we have a customer registration form.
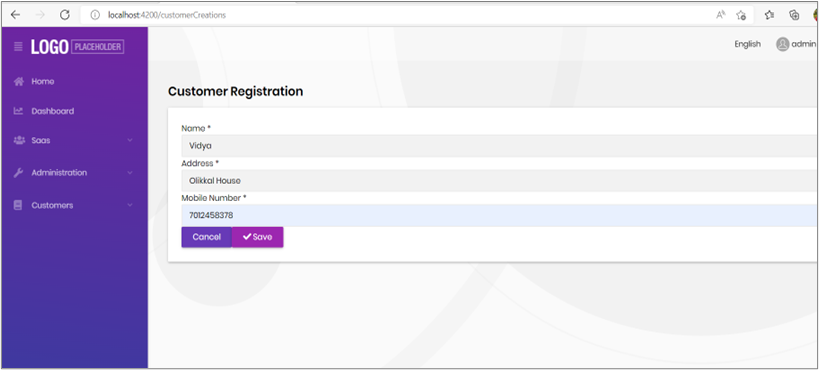
Customer will get a response message after submitting the registration form
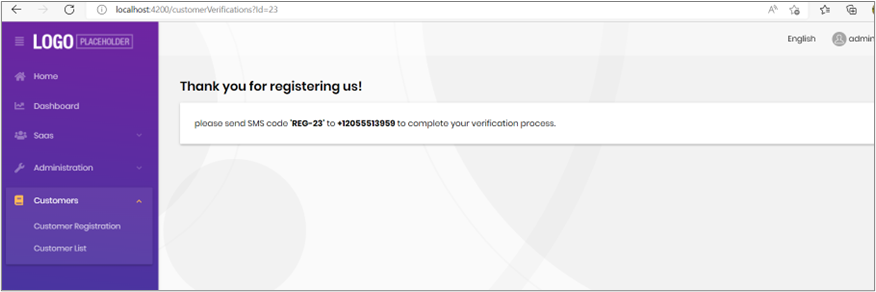
The number displayed in the message is a Twilio number. If the customer sends SMS to this Twilio number our application will get notified about it. We will save the SMS details to our database table (AppTwilioSmsLogs).
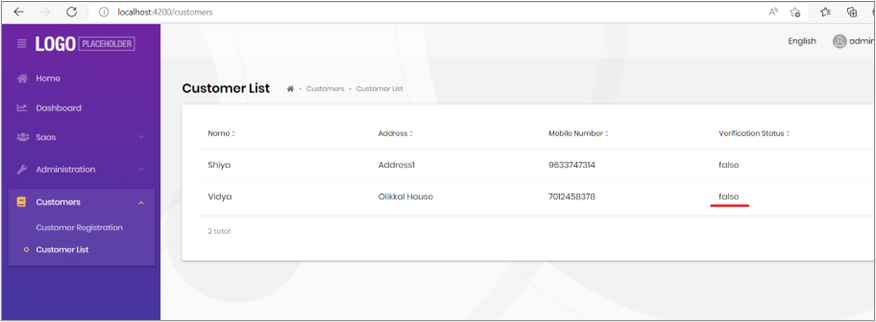
Customer list
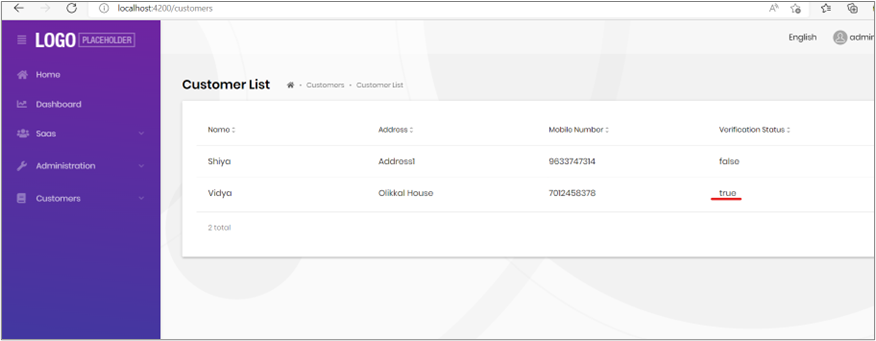
By default, all customer’s verification status is set as false. Once the SMS is sent, it will be updated as true after verifying the mobile number and customer Id from the SMS details.
Now we can send SMS to Twilio number

Then customer will get response message and at the same time Twilio will send the SMS details to our web API through the webhook static URL which is configured in Twilio console.
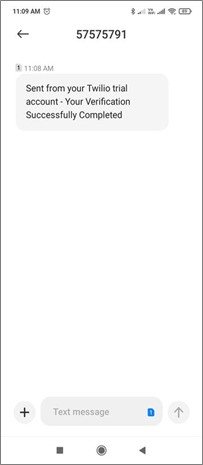
SMS text contains a numeric field (eg: REG-23), this is our newly registered customer’s Id (fetched from customer table).
We will extract this customer id from this text when our API get SMS details from Twilio with webhook and check for the customer id existence in our db. If the customer id is valid, then we will update the customer table column “VerificationStatus” as true.
Web Application development
Create a new solution in ABP Framework:
Login to your account
To use ABP Commercial features, you need to login your account using the ABP CLI:
abp login <username>Install the ABP Suite
ABP Suite is an application aims to assist you on your development.
First, you need to install the ABP Suite:
abp suite installRun the ABP Suite with the following command:
abp suite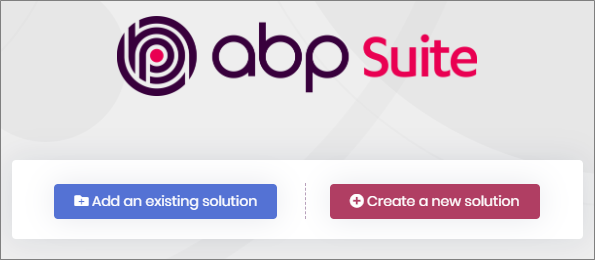
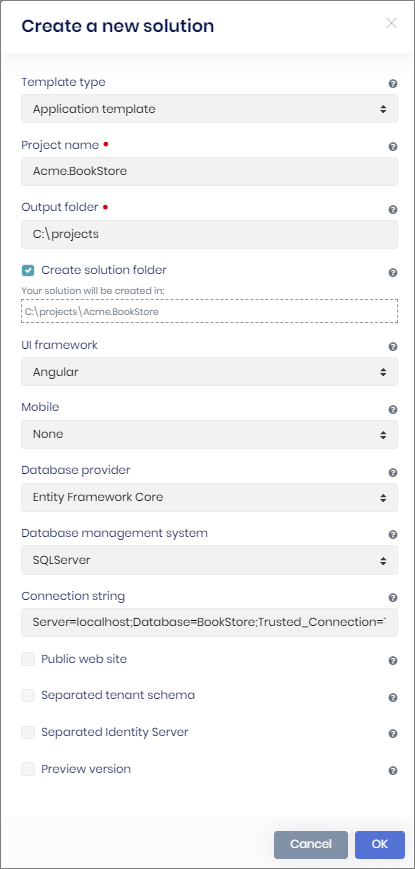
Click to the Create a new solution button and fill the modal form:
Create the Database
Check the connection string in the appsettings.json file under. HttpApi.Host project.
change the server’s name and database name as yours. Once you done with this, then add migration using NuGet Package Manager Console and update the database. To seed the initial data, you need to use. DbMigrator at least once for a new database. Initial seed data creates the admin user in the database (with the password is 1q2w3E*) which is then used to login to the application.
Running the HTTP API Host (Server Side)
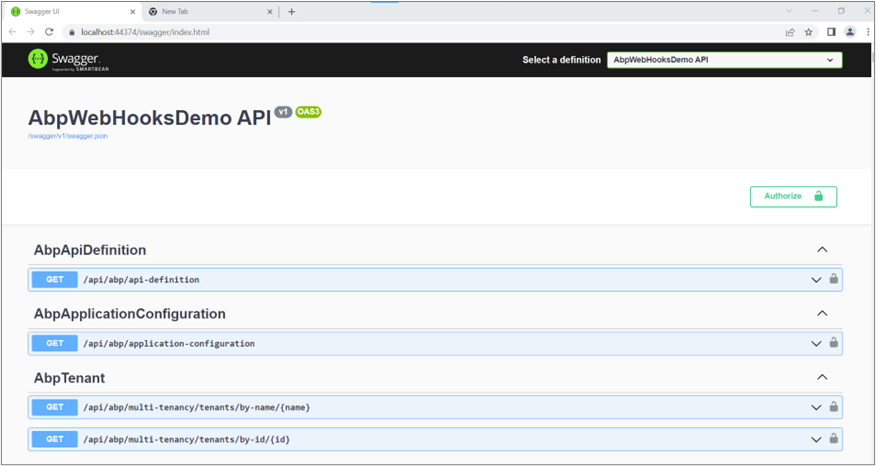
Ensure that the. HttpApi.Host project is the startup project and run the application which will open a Swagger UI:
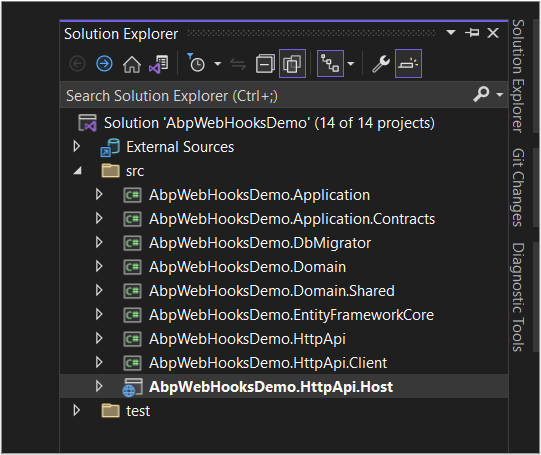
This is our solution
Creating Custom entity
We are going to create customer and Twilio SMS logs entity first
Create a new folder “Customers” in .Domain project and create two entity classes.
public class Customer: AuditedAggregateRoot<long>
    {
     public string Name { get; set; }
     public string Address { get; set; }
     public string MobileNumber { get; set; }
     public bool VerificationStatus { get; set; }
    }
    public class TwilioSmsLog : AuditedAggregateRoot<long>
    {
     public string FromNumber { get; set; }
     public string SmsText { get; set; }
    }
Add entities to the dB Context and map the Entities to a database table in the .Entity Framework Core project:
public DbSet<Customer> customers { get; set; }public DbSet<TwilioSmsLog> twilioSmsLogs { get; set; }then add migration and update database.
Add sample seed data:
Create a class deriving from the IDataSeedContributor in the *.Domain project by copying the following code:
    public class AbpWebHooksDemoDataSeederContributor: IDataSeedContributor, ITransientDependency
{
  private readonly IRepository <Customer> _customerRepository;
  public AbpWebHooksDemoDataSeederContributor (IRepository <Customer, long> customerRepository)
   {
    _customerRepository = customerRepository;
   }

    public async Task SeedAsync(DataSeedContext context)
     {
      //Customers
      if (await _customerRepository.GetCountAsync() <= 0)
        {
         await _customerRepository.InsertAsync(
         new Customer
            {
              Name = "Shiya",
              Address = "Address1",
              MobileNumber = "9633747314",
              VerificationStatus = false
            }
        );

         await _customerRepository.InsertAsync(
         new Customer
            {
              Name = "Vidya",
              Address = "Address2",
              MobileNumber = "7012458378",
              VerificationStatus = false
            }
        );
        }

    }
}
Create the Application Service
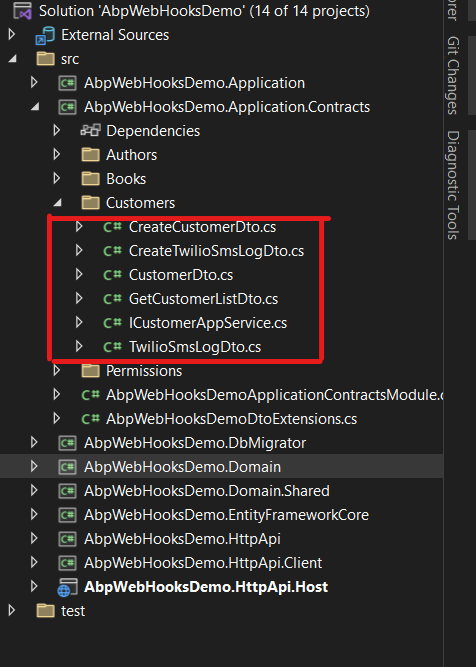
Create DTO classes for the application service
Customer service Interface
public interface ICustomerAppService : IApplicationService
    {
       Task<PagedResultDto<CustomerDto>> GetCustomerListListAsync(GetCustomerListDto input);

       Task<CustomerDto> CreateCustomerAsync(CreateCustomerDto input);

       Task UpdateCustomerASVerifiedAsync(long id);

       Task<TwilioSmsLogDto> CreateSmsLogAsync(CreateTwilioSmsLogDto input);

    }
It will be needed to map customer entities to customer DTO objects while returning customer to the presentation layer.
AutoMapper library can automate this conversion when you define the proper mapping. The startup template comes with AutoMapper configured, so you can just define the mapping in the AbpWebHooksDemoApplicationAutoMapperProfile class in the AbpWebHooksDemo.Application project:
    public AbpWebHooksDemoApplicationAutoMapperProfile()
    {
       CreateMap<Customer, CustomerDto>();
       CreateMap<TwilioSmsLog, TwilioSmsLogDto>();
    }
Create customer service in the. Application project and paste the following code:
    namespace AbpWebHooksDemo.Customers
{
 public class CustomerAppService : AbpWebHooksDemoAppService, ICustomerAppService
  {
    private readonly IRepository<Customer> _customerRepository;
    private readonly IRepository<TwilioSmsLog> _twilioSmsLogRepository;
    public CustomerAppService(IRepository<Customer, long> customerRepository, IRepository<TwilioSmsLog> twilioSmsLogRepository)
     {
        _customerRepository = customerRepository;
        _twilioSmsLogRepository = twilioSmsLogRepository;
     }

        public async Task<CustomerDto> CreateCustomerAsync(CreateCustomerDto input)
         {
            var customer = new Customer
            {
                Name = input.Name,
                Address = input.Address,
                MobileNumber =input.MobileNumber,
                VerificationStatus = input.VerificationStatus
            };
            await _customerRepository.InsertAsync(customer, autoSave: true);
            return ObjectMapper.Map<Customer, CustomerDto>(customer);
         }

        public async Task<TwilioSmsLogDto> CreateSmsLogAsync(CreateTwilioSmsLogDto input)
         {
            var twilioSmsLog = new TwilioSmsLog
            {
                SmsText = input.SmsText,
                FromNumber = input.FromNumber
            };
            await _twilioSmsLogRepository.InsertAsync(twilioSmsLog);
            //split sms text to get customer Id
            String[] strlist = twilioSmsLog.SmsText.Split("-", StringSplitOptions.RemoveEmptyEntries);
            long id = Convert.ToInt64(strlist[1]);
            await UpdateCustomerASVerifiedAsync(id);
            return ObjectMapper.Map<TwilioSmsLog, TwilioSmsLogDto>(twilioSmsLog);
         }

        public async Task<PagedResultDto<CustomerDto>> GetCustomerListListAsync(GetCustomerListDto input)
         {
            if (input.Sorting.IsNullOrWhiteSpace())
            {
                input.Sorting = nameof(Customer.Name);
            }

            var customers = await _customerRepository.GetListAsync();

            var totalCount = input.Filter == null
                ? await _customerRepository.CountAsync()
                : await _customerRepository.CountAsync(
                    customer => customer.Name.Contains(input.Filter));

            return new PagedResultDto<CustomerDto>(
                totalCount,
                ObjectMapper.Map<List<Customer>, List<CustomerDto>>(customers)
            );
         }

        public async Task UpdateCustomerASVerifiedAsync(long id)
         {
            var queryable = await _customerRepository.GetQueryableAsync();
            var customer = queryable.Where(x => x.Id == id).FirstOrDefault();
            customer.VerificationStatus = true;
            await _customerRepository.UpdateAsync(customer);
         }
    }
}
Set up an angular project. Then create new two forms “customer registration” and “customer list”.
Integrate Twilio into application
First register in the Twilio website and buy a Twilio phone number.
You will get all the step-by-step details of the procedures from Twilio website. If you are using a trial Twilio account, you can only send text messages to Verified Caller IDs. Verify your phone number or the phone number you want to SMS if it is not on the list of Verified Caller IDs.
1. Create a SMS Endpoint
You need to create an endpoint for a POST request called “sms”. This endpoint is where Twilio will send an HTTP request when a message is sent to your Twilio phone number.
Our sms endpoint will be configured as the webhook URL in the Twilio Console.
The following code creates an endpoint handling HTTP POST requests to /sms. This endpoint returns TwiML or Twilio Markup Language to tell Twilio how to respond to the incoming message.
We used the Twilio SDK for C# and .NET. The Twilio SDK has APIs to build the TwiML for us. To add the SDK, you need to add the Twilio NuGet package.
You can install the NuGet package with the .NET CLI using the following command:
dotnet add package Twiliodotnet add package Twilio.AspNet.CoreAlternatively, from the Package Manager Console or Developer PowerShell, run the following command to install the latest version:
Install-Package Twilio.AspNet.CoreCreate a new controller called ManageTwilioController in .HttpApi.Host project :
First add the following namespaces
using Twilio.TwiML;
using Twilio.AspNet.Core;
using Twilio.AspNet.Common;
Then paste the following code:
public class ManageTwilioController : TwilioController
{
private readonly CustomerAppService customerAppService;
public ManageTwilioController(CustomerAppService _customerAppService)
{
customerAppService = _customerAppService;
}
//To handle Text message
[HttpPost]
public async Task<TwiMLResult> sms(SmsRequest request)
{
var response = new MessagingResponse();
CreateTwilioSmsLogDto twilioSms = new CreateTwilioSmsLogDto();
twilioSms.SmsText = request.Body;
twilioSms.FromNumber= request.From;
await customerAppService.CreateSmsLogAsync(twilioSms);
response.Message("Your Verification Successfully Completed");
return TwiML(response);
}
//To handle Voice message
[HttpPost]
public TwiMLResult voice(VoiceRequest request)
{
var response = new VoiceResponse();
response.Say("Your Verification Successfully Completed");
return TwiML(response);
}
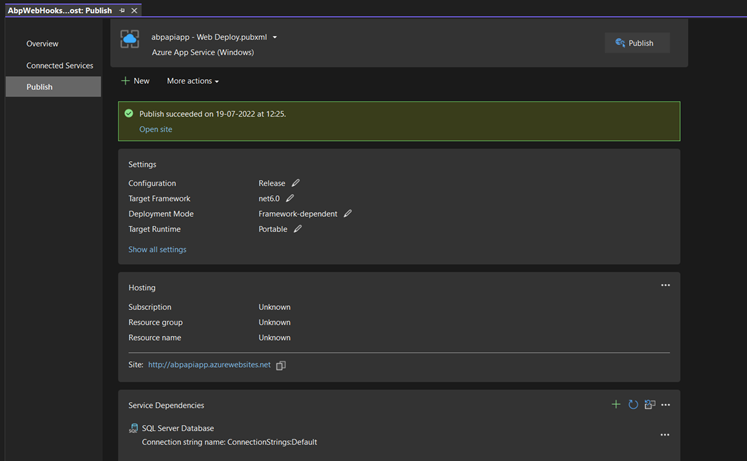
} Publish your API in Azure and configure your API Url in Twilio console as webhook URL.
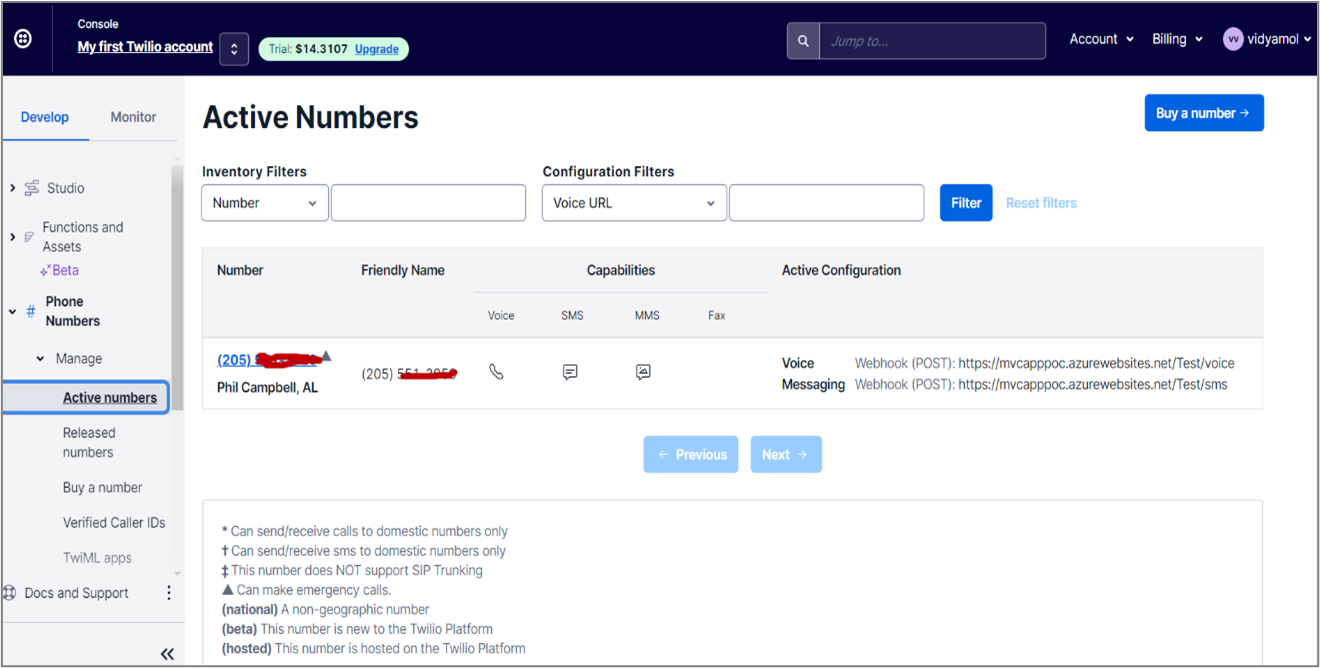
2. Configuring your API in Twilio console
Now you need to configure your Twilio Phone Number to send HTTP requests to your server. Navigate to Phone Numbers - Manage - Active Numbers.
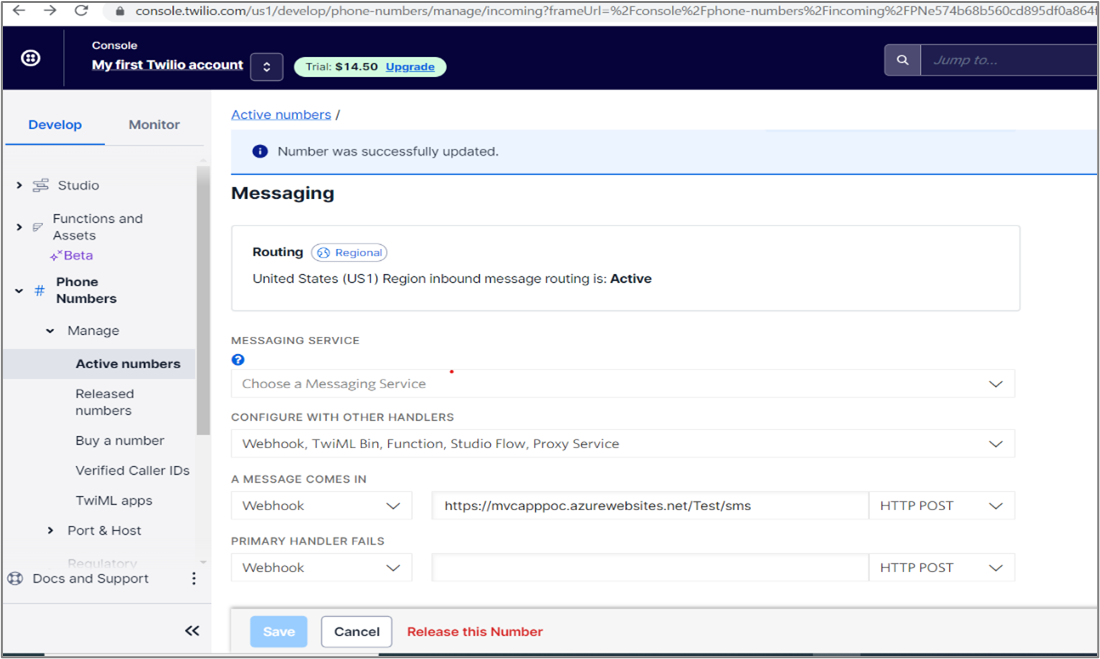
Select the number you purchased earlier. Then scroll down to the Messaging section to configure what happens when a message comes to our Twilio number.
Update the section that says When a Message Comes In. Make sure Webhook is selected and paste your API URL HTTPS Forwarding followed by /sms URL in the text box to send webhook HTTP requests to the /sms endpoint.
Make sure the far right drop down has HTTP POST selected and save your changes to the phone number configuration.
Now, try sending a message to your Twilio Phone Number from your cell phone. Then Twilio will send SMS details to our API through webhook URL. We will update our customer as verified and save the SMS log details to our table in the database with these details.
Featured Comments
Lorem ipsum dolor sit amet, consectetur adipiscing elit, sed do eiusmod tempor
Lorem ipsum dolor sit amet, consectetur adipiscing elit, sed do eiusmod tempor
Lorem ipsum dolor sit amet, consectetur adipiscing elit, sed do eiusmod tempor
More Articles from Kirti Kulkarni


With over 20 years of experience in software development, Kirti heads Product R&D and Competency Management at WAi Technologies, leading the training and skills upgradation program at WAi. Kirti introduced the 'Women Back To Work' Initiative that encourages women to return back to mainstream software development after a career break or sabbatical.