
Jul 26, 2022Beginner-12 min
Create database per tenant in SQL Elastic Pool with ABP Commercial
In this short article let me show you the steps to create tenant wise databases and add them to the elastic pool server programmatically.
Scenario
ABP Commercial multitenant application with database per tenant.
What is SQL Elastic Pool Server?
Azure SQL Database elastic pools are a simple, cost-effective solution for managing and scaling multiple databases that have varying and unpredictable usage demands.
In certain multi-tenant application scenarios where the customer has multiple databases having highly varying workloads and it needs a great performance in an irregular manner, Elastic pools provide an effective solution
The databases in an elastic pool reside on a single server and share a set number of resources at a set price. Elastic pools in SQL Database enable SaaS applications to optimize the price and performance for a group of databases and restrict to a fixed budget. This is perfect solution for a multi-tenant SaaS application.
The host can control Azure costs based on usage.
Let’s get Started
This tutorial assumes that you've already purchased an ABP Commercial license and have an active ABP Commercial account.
So go to the link for creating the new solution.
https://docs.abp.io/en/commercial/latest/getting-started-create-solution?UI=NG&DB=EF&Tiered=Yes
As we covered all those steps for creating new solution, we start by opening the project and checking the connection string in the appsettings.json file under the .HttpApi.Host project.
"ConnectionStrings":
    {
        "Default":
        "Server=localhost;Database=BookStore;Trusted_Connection=True"
    }
Database Migrations
The solution uses the Entity Framework Core Code First Migration approach. It comes with a .DbMigrator console application which applies the database migrations and also seeds the initial data. It is useful on the development as well as on production environment.
.DbMigrator project has its own appsettings.json. So, if you have changed the connection string above, you should also change this one.
The Initial Migration
.DbMigrator application automaticallycreates the Initial migration on first run.
Now, open a command line terminal in the folder of the .DbMigrator project and run the following command:
dotnet runRunning the DbMigrator
Right click to the .DbMigrator project and select Set as StartUp Project

Hit F5 (or Ctrl+F5) to run the application. It will have an output like shown below:
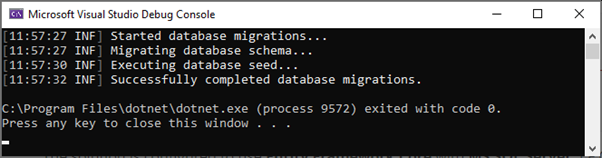
Initial seed data creates the admin user in the database (with the password is 1q2w3E*) which is then used to login to the application. So, you need to use .DbMigrator at least once for a new database.
Running the Application
Running the HTTP API Host (Server Side)
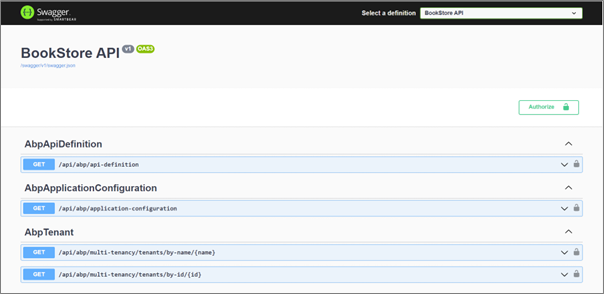
Ensure that the. HttpApi.Host project is the start-up project and run the application which will open a Swagger UI:
Use Ctrl+F5 in Visual Studio (instead of F5) to run the application without debugging. If you don't have a debug purpose, this will be faster.
Running the Angular Application
Go to the angular folder, open a command line terminal, type the yarn command (we suggest to the yarn package manager while npm install will also work)
yarnBash
Copy
Once all node modules are loaded, execute yarn start (or npm start) command:
yarn startBash
copy
It may take a longer time for the first build. Once it finishes, it opens the Angular UI in your default browser with the localhost:4200 address.
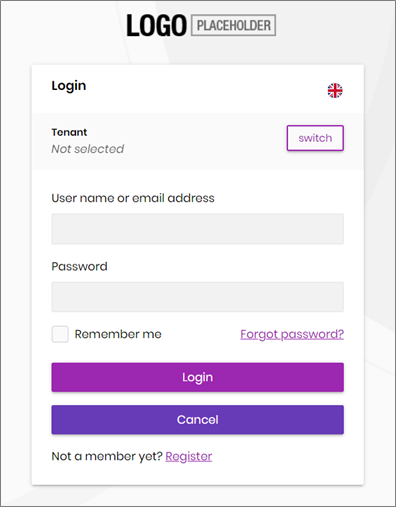
Enter admin as the username and 1q2w3E* as the password to login to the application. The application is up and running. You can start developing your application based on this start-up template.
Steps for Adding Tenant Databases into Elastic Pool Server
Changes on the Backend
1.Create A new class SQLHelperUtilityClass.cs into the Data folder .Domain project
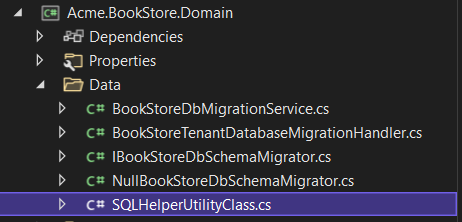
SQLHelperUtilityClass.cs
using System;
    using System.Collections.Generic;
    using System.Data;
    using System.Data.SqlClient;
    using System.Linq;
    using System.Text;
    using System.Threading.Tasks;

    namespace Acme.BookStore.Data
     {

      public class SQLHelperUtilityClass
        {
            public static void AddTenantWiseDbToElasticPool(string dbName)
             {
                SqlConnection conn = new SqlConnection("Data Source=localhost;" + "Initial Catalog=dbname;" + "User ID=userid;" + "Password=pass;" + "Connection Timeout=3600");
                try
                {
                    SqlCommand cmd = new SqlCommand("add_db_elastic_pool", conn);
                    cmd.CommandType = CommandType.Text;
                    cmd.CommandText = "CREATE DATABASE " + dbName + " ( SERVICE_OBJECTIVE = ELASTIC_POOL (name = elasticpoolname ));";
                    conn.Open();
                    cmd.ExecuteNonQuery();
                    conn.Close();
                }
                    catch (Exception ex)
                    {
                        if (conn.State == ConnectionState.Open)
                        {
                            conn.Close();
                        }
                    }
                }
        }
2.Create a private function in the file TenantDatabaseMigrationHandler.cs file
private async Task<string> GetDBName(string connectionString)
    {
        try
        {
            await Task.Yield();
            string[] stringSeparators = connectionString.Contains("Initial Catalog") == true ? new string[] { "Initial Catalog=", ";Persist Security " } : new string[] { "Database=", ";Persist Security " };
            string[] firstNames = connectionString.Split(stringSeparators, StringSplitOptions.TrimEntries);
            return firstNames[1];
        }
        catch (Exception ex)
        {
            _logger.LogException(ex);
            return "";
        }
    }
Call the above function in the same file migrator foreach loop
string connectionString = tenantConfiguration.ConnectionStrings.FirstOrDefault().ToString();
    foreach (var migrator in _dbSchemaMigrators)
        {
            await migrator.MigrateAsync();
            string dbName = await GetDBName(connectionString);
            SQLHelperUtilityClass.AddTenantWiseDbToElasticPool(dbName);
        }
The complete code for the class now looks like this
using System;
using System.Collections.Generic;
using System.Linq;
using System.Threading.Tasks;
using Microsoft.Extensions.Logging;
using Volo.Abp.Data;
using Volo.Abp.DependencyInjection;
using Volo.Abp.EventBus.Distributed;
using Volo.Abp.Identity;
using Volo.Abp.MultiTenancy;
using Volo.Abp.Uow;
namespace Acme.BookStore.Data;
public class BookStoreTenantDatabaseMigrationHandler :
    IDistributedEventHandler<TenantCreatedEto>,
    IDistributedEventHandler<TenantConnectionStringUpdatedEto>,
    IDistributedEventHandler<ApplyDatabaseMigrationsEto>,
    ITransientDependency
{
    private readonly IEnumerable<IBookStoreDbSchemaMigrator> _dbSchemaMigrators;
    private readonly ICurrentTenant _currentTenant;
    private readonly IUnitOfWorkManager _unitOfWorkManager;
    private readonly IDataSeeder _dataSeeder;
    private readonly ITenantStore _tenantStore;
    private readonly ILogger<BookStoreTenantDatabaseMigrationHandler> _logger;
    public BookStoreTenantDatabaseMigrationHandler(
        IEnumerable<IBookStoreDbSchemaMigrator> dbSchemaMigrators,
        ICurrentTenant currentTenant,
        IUnitOfWorkManager unitOfWorkManager,
        IDataSeeder dataSeeder,
        ITenantStore tenantStore,
        ILogger<BookStoreTenantDatabaseMigrationHandler> logger)
    {
        _dbSchemaMigrators = dbSchemaMigrators;
        _currentTenant = currentTenant;
        _unitOfWorkManager = unitOfWorkManager;
        _dataSeeder = dataSeeder;
        _tenantStore = tenantStore;
        _logger = logger;
    }
        public async Task HandleEventAsync(TenantCreatedEto eventData)
    {
        await MigrateAndSeedForTenantAsync(
        eventData.Id,
        eventData.Properties.GetOrDefault("AdminEmail") ?? BookStoreConsts.AdminEmailDefaultValue,
        eventData.Properties.GetOrDefault("AdminPassword") ?? BookStoreConsts.AdminPasswordDefaultValue
        );
    }
        public async Task HandleEventAsync(TenantConnectionStringUpdatedEto eventData)
    {
        if (eventData.ConnectionStringName != ConnectionStrings.DefaultConnectionStringName ||
        eventData.NewValue.IsNullOrWhiteSpace())
    {
        return;
    }
        await MigrateAndSeedForTenantAsync(
        eventData.Id,
        BookStoreConsts.AdminEmailDefaultValue,
        BookStoreConsts.AdminPasswordDefaultValue
    );
        /* You may want to move your data from the old database to the new database!
        * It is up to you. If you don't make it, new database will be empty
        * (and tenant's admin password is reset to 1q2w3E*).
        */
    }
        public async Task HandleEventAsync(ApplyDatabaseMigrationsEto eventData)
    {
        if (eventData.TenantId == null)
    {
        return;
    }
        await MigrateAndSeedForTenantAsync(
        eventData.TenantId.Value,
        BookStoreConsts.AdminEmailDefaultValue,
        BookStoreConsts.AdminPasswordDefaultValue
        );
    }
        private async Task MigrateAndSeedForTenantAsync(
        Guid tenantId,
        string adminEmail,
        string adminPassword)
    {
        try
    {
        using (_currentTenant.Change(tenantId))
    {
        // Create database tables if needed
        using (var uow = _unitOfWorkManager.Begin(requiresNew: true, isTransactional: false))
    {
        var tenantConfiguration = await _tenantStore.FindAsync(tenantId);
        if (tenantConfiguration?.ConnectionStrings != null &&
        !tenantConfiguration.ConnectionStrings.Default.IsNullOrWhiteSpace())
    {
        //string connString = "Server=WAILAP173\SQLEXPRESS;Initial Catalog=BookStoreProjectDem0;Persist Security Info=False;MultipleActiveResultSets=False;Encrypt=True;TrustServerCertificate=False;Connection Timeout=3600;";
        string connectionString = tenantConfiguration.ConnectionStrings.FirstOrDefault().ToString();
        foreach (var migrator in _dbSchemaMigrators)
    {
        await migrator.MigrateAsync();
        string dbName = await GetDBName(connectionString);
        SQLHelperUtilityClass.AddTenantWiseDbToElasticPool(dbName);
    }
    }
        await uow.CompleteAsync();
    }
        // Seed data
        using (var uow = _unitOfWorkManager.Begin(requiresNew: true, isTransactional: true))
    {
        await _dataSeeder.SeedAsync(
        new DataSeedContext(tenantId)
        .WithProperty(IdentityDataSeedContributor.AdminEmailPropertyName, adminEmail)
        .WithProperty(IdentityDataSeedContributor.AdminPasswordPropertyName, adminPassword)
        );
        await uow.CompleteAsync();
    }
    }
    }
        catch (Exception ex)
    {
        _logger.LogException(ex);
    }
    }
        private async Task<string> GetDBName(string connectionString)
    {
        try
    {
        await Task.Yield();
        string[] stringSeparators = connectionString.Contains("Initial Catalog") == true ? new string[]
    {
        "Initial Catalog=", ";Persist Security " } : new string[] { "Database=", ";Persist Security " };
        string[] firstNames = connectionString.Split(stringSeparators, StringSplitOptions.TrimEntries);
        return firstNames[1];
    }
        catch (Exception ex)
    {
        _logger.LogException(ex);
        return "";
    }
    }
}
Changes on the Frontend
1. After login as a host admin, click on the Saas option then Tenants of the left-side menu.
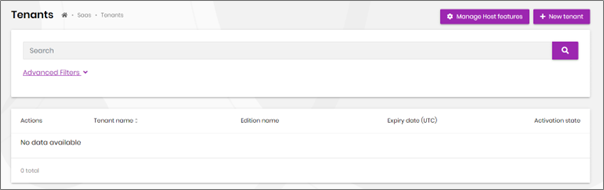
2. Click on the + New tenant button which is present on the right-side corner
3. After clicking fill all tenant information include the connection strings.
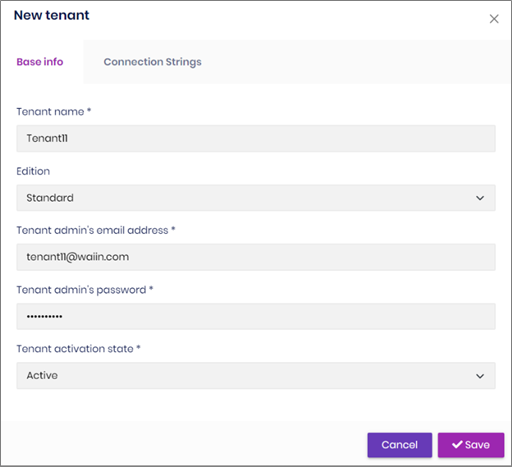
Make sure that the default connection string format is in the form of :
(Server=elasticpoolserverpoc;Initial Catalog=Tenant11;Persist Security Info=False;).
In this case elasticpoolserverpoc is created and managed by the host in their Azure portal. Please refer to this link for creating the SQL elastic pool https://docs.microsoft.com/en-us/azure/azure-sql/database/elastic-pool-overview?view=azuresql#create-a-new-sql-database-elastic-pool-by-using-the-azure-portal

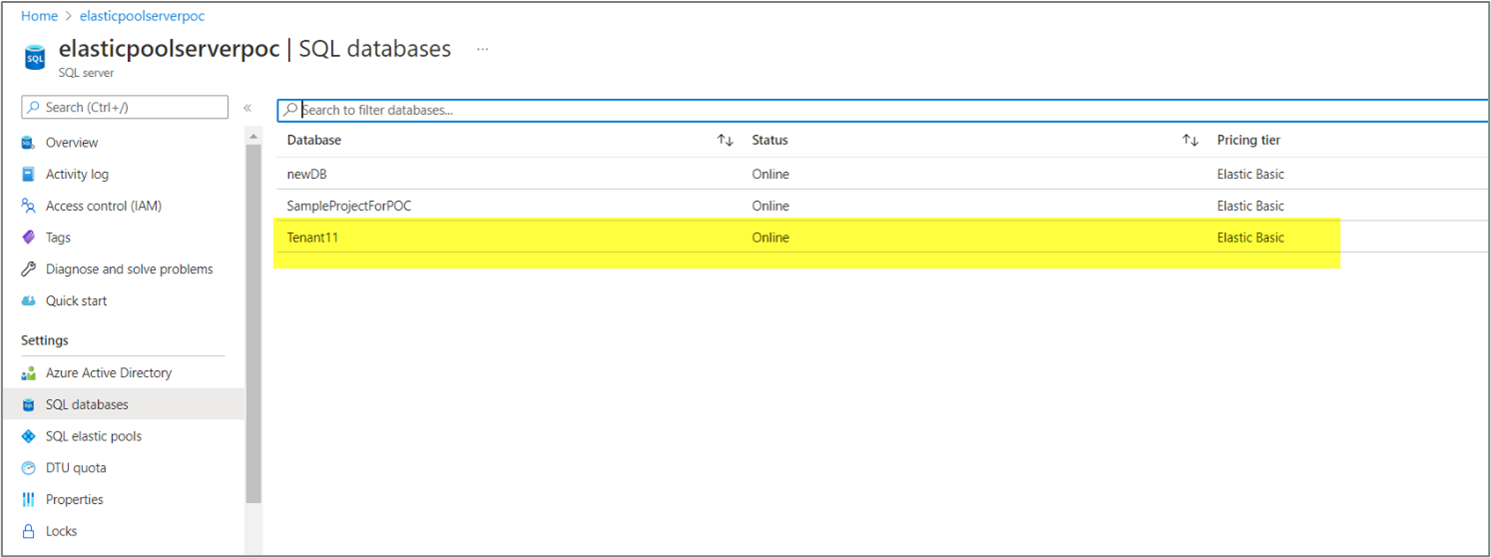
Once the tenant is created, the tenant database is automatically created in the Azure SQL elastic pool that is maintained by the host. If you check out your Azure portal, you will find these databases added under the SQL elastic pool as shown in the figure below.
Please do let us know any specific scenario or user story that you would like us to demonstrate. HireTechTeam developers have implemented huge number of varied solutions for our customers with ABP commercial. Write to us at : info@waiin.com
Featured Comments
Lorem ipsum dolor sit amet, consectetur adipiscing elit, sed do eiusmod tempor
Lorem ipsum dolor sit amet, consectetur adipiscing elit, sed do eiusmod tempor
Lorem ipsum dolor sit amet, consectetur adipiscing elit, sed do eiusmod tempor
More Articles from Kirti Kulkarni

With over 20 years of experience in software development, Kirti heads Product R&D and Competency Management at WAi Technologies, leading the training and skills upgradation program at WAi. Kirti introduced the 'Women Back To Work' Initiative that encourages women to return back to mainstream software development after a career break or sabbatical.