Sep 02, 2022Beginner-12 min
Deploying ABP angular application to Azure and App Insights integration
Introduction
In this article, I will share the steps for manually deploying an ABP Commercial Angular application and backend on Azure and how to integrate Azure App Insights with the application.
Azure App Insights is an application performance management service for web applications and helps to monitor your website performance and to get insight into tenants and users. It enables you to monitor and improve the performance of your application.It’s designed to ensure optimal application performance. It also has a powerful analytic tool that helps you diagnose issues and gain an understanding of how people are using your web application.
This article assumes that you have already created an ABP Commercial application based on the modular application template, with Angular as UI framework and Entity Framework Core as database provider.
1.In case you have not already done, please follow the instructions outlined here to run the ABP application locally
https:docs.abp.io/en/commercial/latest/getting-started-running-solution?UI=NG&DB=EF&Tiered=No
2.Here is the local Swagger API Application listing as part of the Backend application

This is the Angular frontend application .
Creating an Azure App Service for Backend
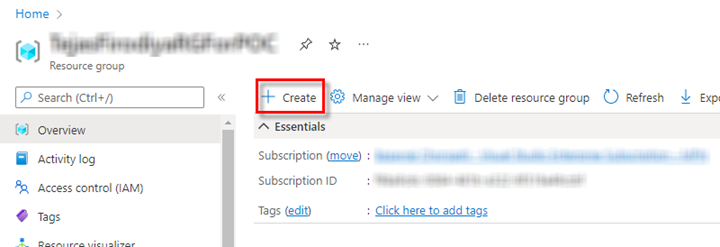
Open your resource group of Azure Portal
Click on Create to create a Web Application
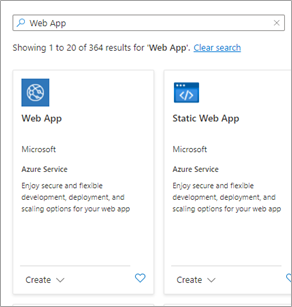
a. Now you will see multiple azure services.
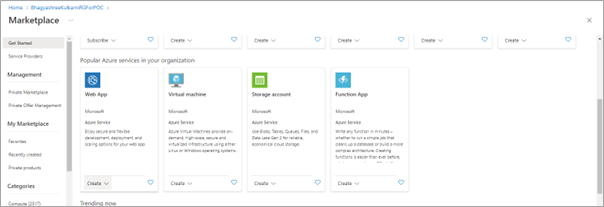
b. From it, we need a Web App, click on Create
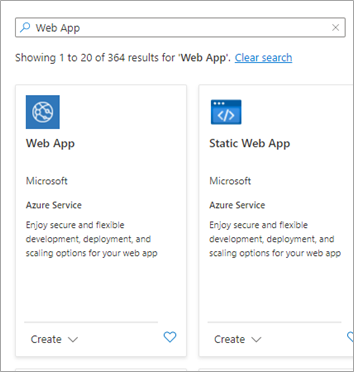
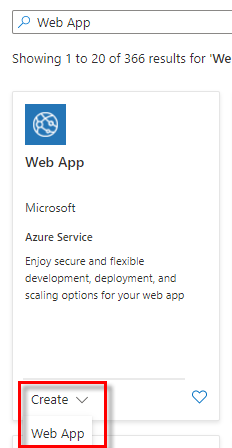
4. Click on Web App

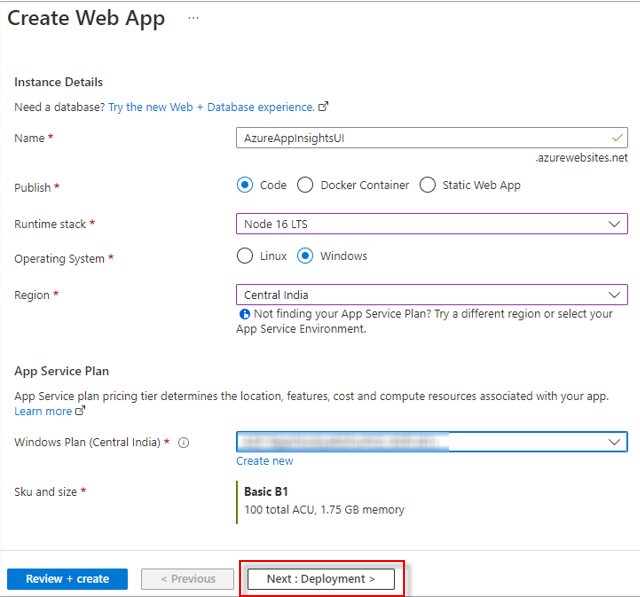
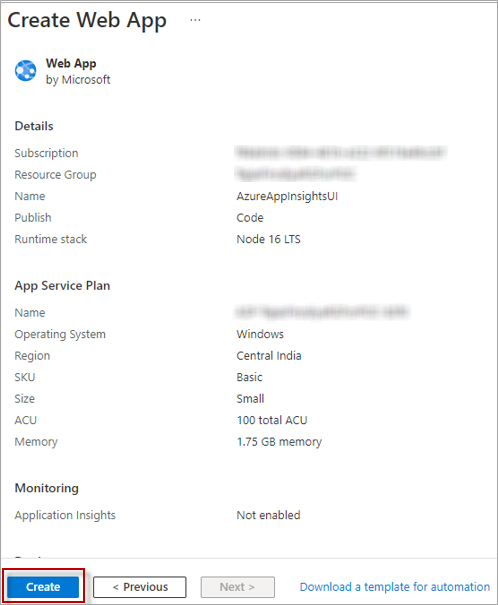
5. Now you will see the Create web app window. Here you can see Your subscription and resource group name. Make sure you have selected the correct resource group.
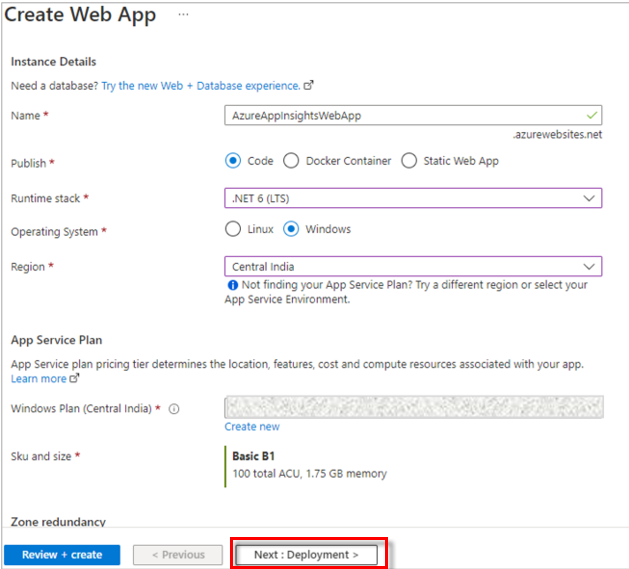
a. Now give the appropriate name to your database (it must be unique) and select the publishing format. Here we are publishing code so selecting the code option.
b. In the Runtime stack, select the technology/Language in which your product is created. Here we used .net6 (LTS).
c. Select the Operating system as per your requirement(We are selecting Linux here).
d. Same for the region, select as your requirement we are selecting central India here.
e. Now in SKU and size click on the change size option. Here we can see three category plans dev/test, Production, and Isolated.
*Dev/Test: If your application is under development or testing mode you should use this option.
*Production: For live applications which are already getting used by customers you should use this option.
*Isolated: In this case, it runs dedicated Azure VMs on dedicated Azure Virtual Networks. It provides network isolation on top of computing isolation to your apps. It provides the maximum scale-out capabilities.
Here we already changed the size of SKU, hence you are not able to see the change size option above, but you can
See the change size option as shown below.

f. Select Dev/Test option and click on Apply.
6. Click Deployment (Next) = Networking (Next) = Monitoring (Next) = Tags (Next). Keep the default setting as it is.
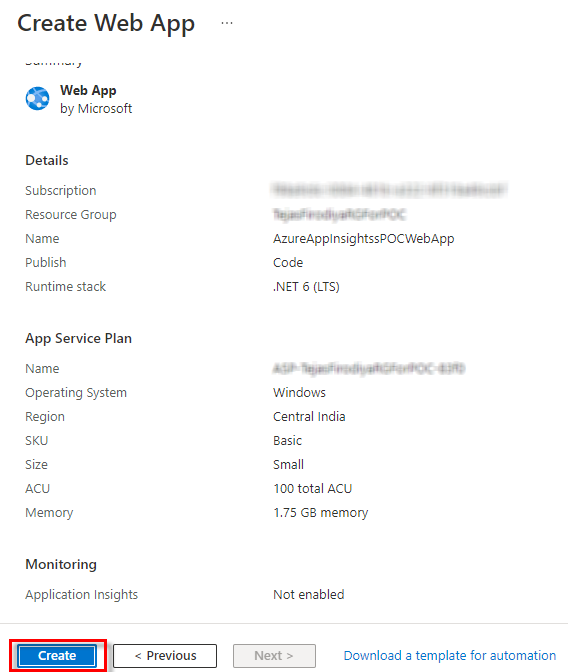
7. Now on the Review + Create page click on Create. It will start creating your web application
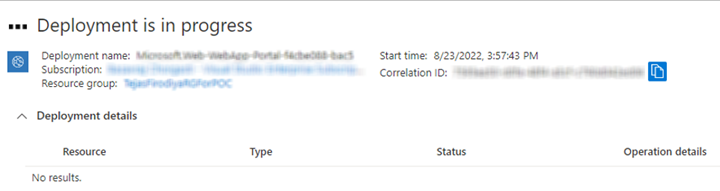
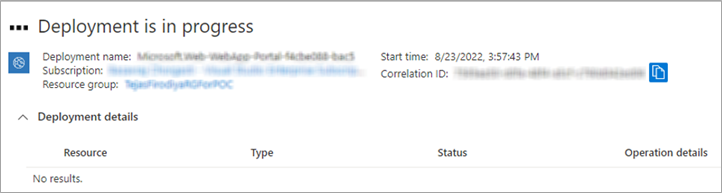
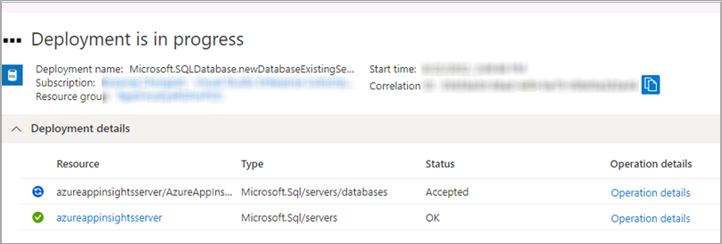
You will see the following page showing your deployment is in progress, wait till it’s done.
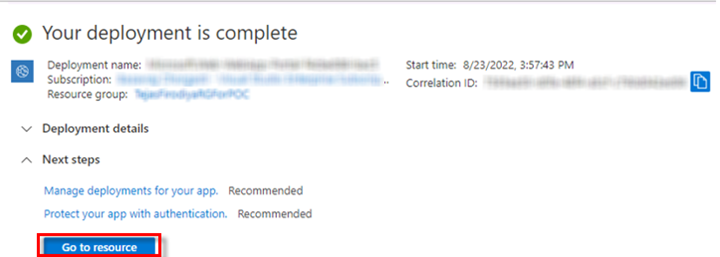
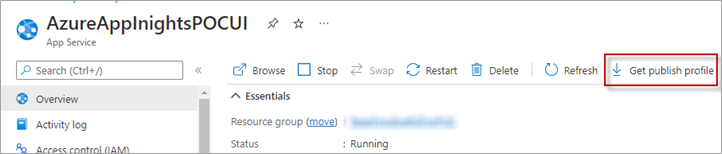
And here we go …..web app service for your backend application is ready
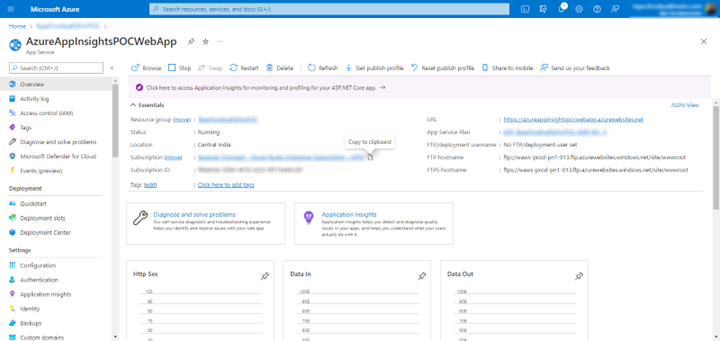
This is how your web app service will look.
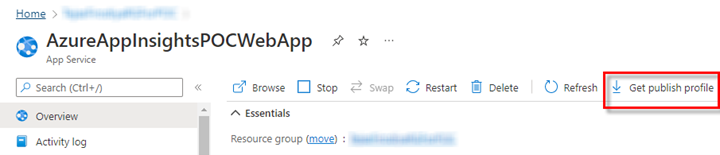
Now Click on ‘Get publish profile ‘.One file will be get downloaded here, we will use it later
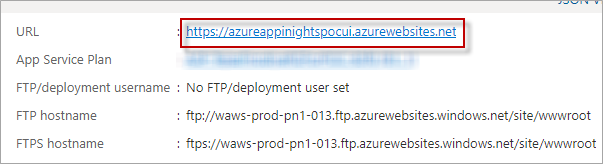
In your resource group, now you can see your app service running.
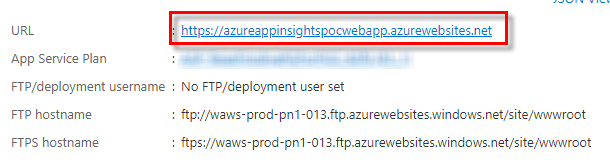
This is the URL of your azure web app service we will be using this URL while publishing your application in this web app service. Copy this URL somewhere in notepad as a backend web app we will use this later.
Now we need to create one more web app service for publishing your angular project too.
Creating Frontend App Service
1. Open your resource group of Azure Portal
2. Click on Create to create a Web Application

3. Now you will see multiple azure services.
4. Now you will see the Create web app window. Here you can see Your subscription and resource group name. Make sure you have selected the correct resource group
Fill in all the details carefully as we did it before.
While giving the name to this app service try to use UI at the end of your app service name. It will be easy for you to differentiate your app service as a back-end application and the front-end one. (Not compulsory step)
Just while selecting the Runtime Stack option make sure, you select the Node option here as we are going to publish your angular application inside this app service

Now App service for publishing Your Angular application is also ready.
Click on Get publish Profile one file will get downloaded we will be using this later.
This is how your web app service will look.
This URL we will use later while publishing your backend application to this azure app service.
Now we need to create azure SQL for our azure web application. SQL servers on our local machines are not accessible here.
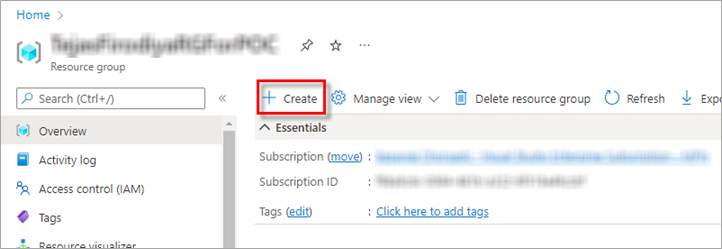
Now Go to Home and click on your resource group. You will get redirected to the resource group dashboard. Here click on Create.
Creating Azure Database
Search for SQL, you will see multiple SQL database options here.
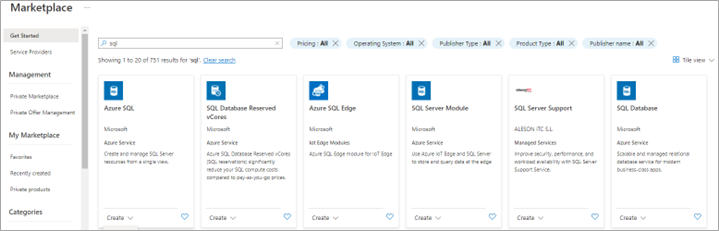
Click on Create = Azure SQL

Now we want SQL databases here click on create

Give the appropriate Server Name and select the location as per your need. Here we are using Central India as a location. Use the same location for the web application and its database to avoid latency.

While giving server name if you are creating it for the first time then give the name to your server as per your requirement.
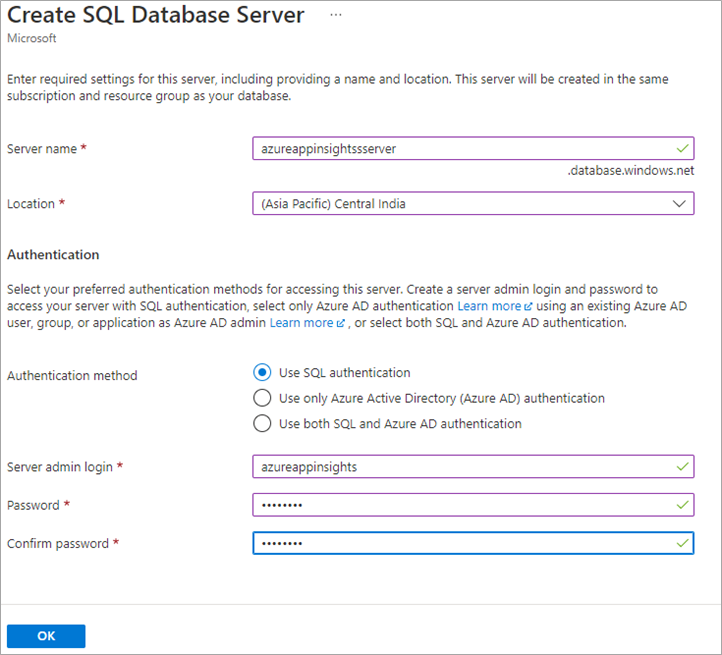
** Remember your password you will need it again while editing your database connection string.
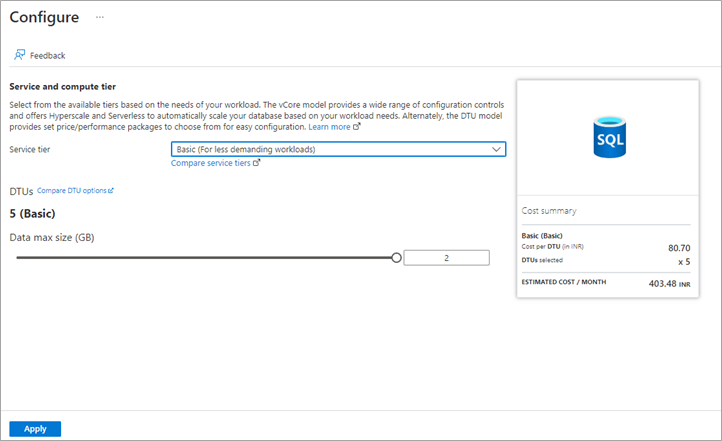
When you click on configure database following window will get displayed.
We are selecting a Basic plan here you can choose as per your requirement. If you are creating this server for testing or learning purpose we recommend you to select the Basic one as this will be the cheapest.
Click on Apply.
Make sure you have selected all options carefully
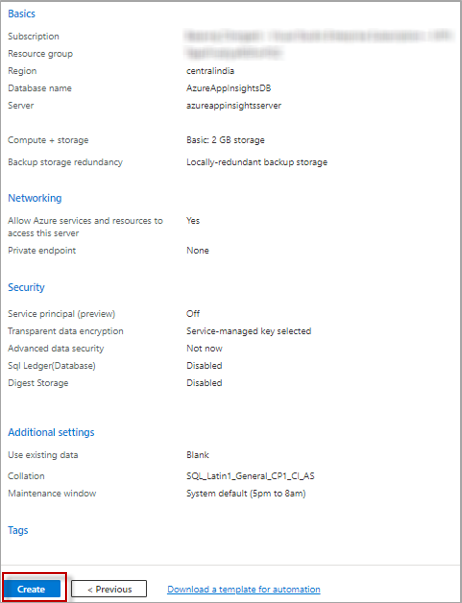
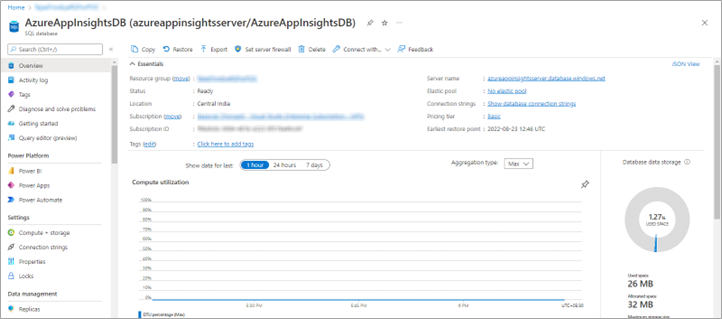
Here we go your SQL server with the database is ready.
Now click on connection strings,

The following window will appear.
Here you need to enter your password which you entered earlier. Remove “your password” and enter the password instead.

Copy this connection string. Store it somewhere in notepad we will be using this ahead.
Publish Backend Application to Azure app service
Now open your application Visual Studio
open appsettings.json
Replace the “SelfUrl” and “Authority” URL with the URL of your backend web app service. (Which we suggested you copy in notepad).
If you didn’t note down URLs open your resource group = open app service for your backend application and copy the URL, paste it here. Make sure you are in the right app service
Do the same step for your Angular application too, for finding URL.
Replace UIappService URL with your ulappservice URL
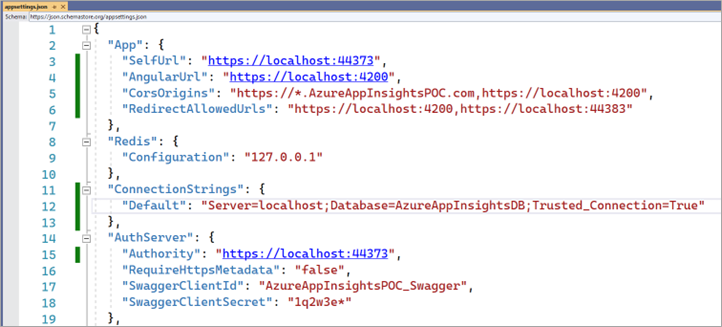
Now change your connection string also. With the connection string of your azure database.
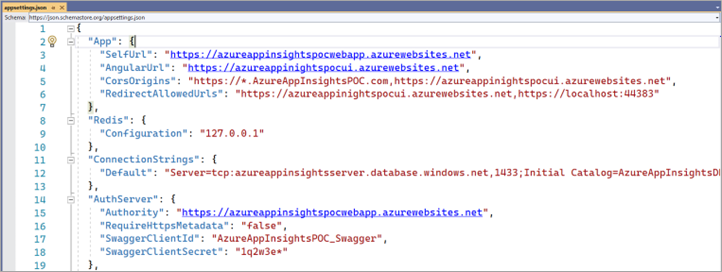
This is how your appSetting.json file should look after replacing the URL and connection string.
Open your DbMigartor project and replace the connection string inside this project too.
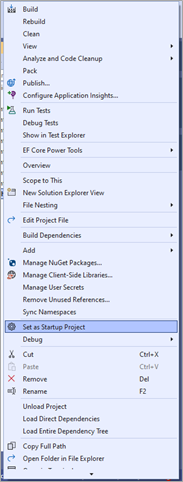
Now right click on the Dbmigrator project click ‘Set as Startup Project ‘

Click on Green arrow to Run the DB migrator project. As shown below

After successful migration, your window will look like as follows
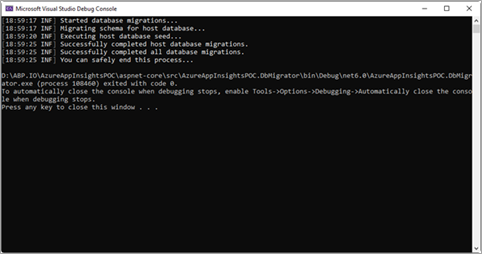
Make sure your public IP has access to Azure Server. Update Azure Firewall accordingly to get access to Azure Server.
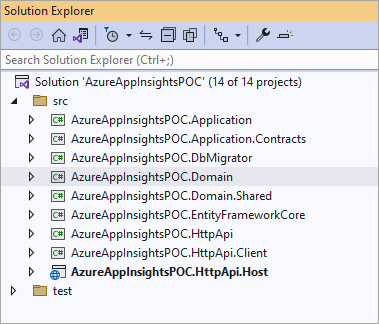
Now click on Your HttpApi.Host project set as a start-up project.
Now we need to publish this application to the Azure app service
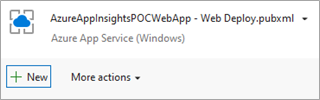
Click on publish.

Select Web Deploy.pubxml.
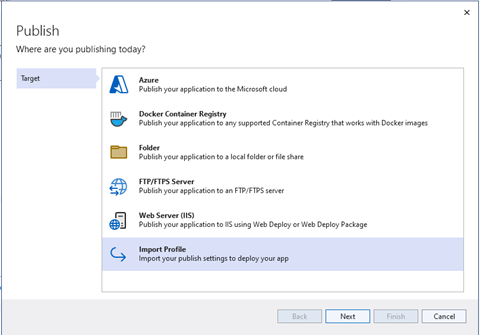
Click on New
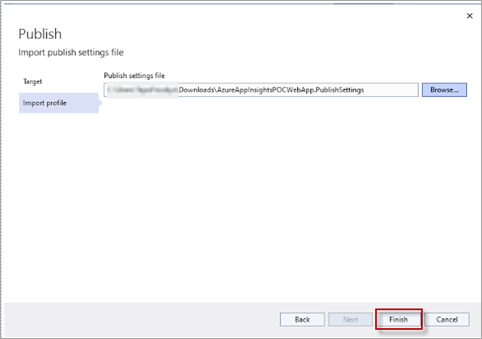
Click on Import profile == Next
Now click on Browse, Go to your downloads, There will be two publishing profile which you downloaded earlier.
This is how your publishing profile files should get displayed in downloads
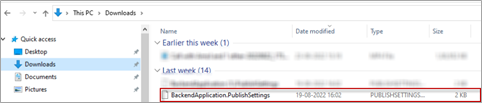
Select publishing profile file of your backend application.
Click on Finish.
Now in Top right corner you will see Publish option. Click on it.

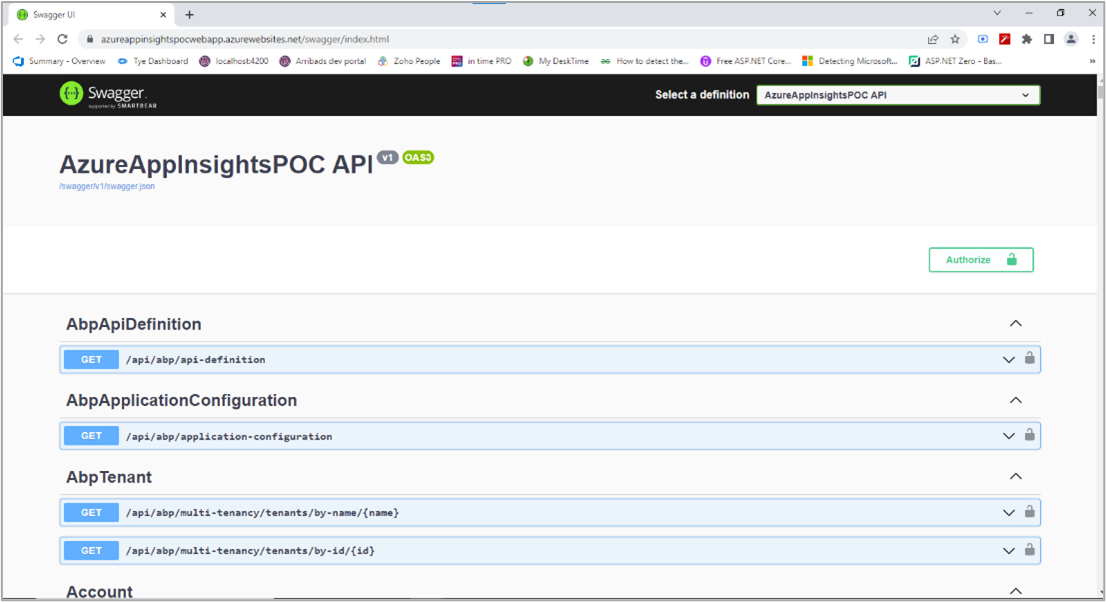
After your publishing done it will render you to swagger page of you backend application.
If you are able to see swagger page like below it means you have successfully published your backend application to your azure app service.
Now we need to publish your angular application to your azure app service.
Now open your angular project in Vs code or any editor you prefer.
We are using visual studio code here.
Deploying Angular application to Azure
On the left side of your screen, you can see sidebar as follow
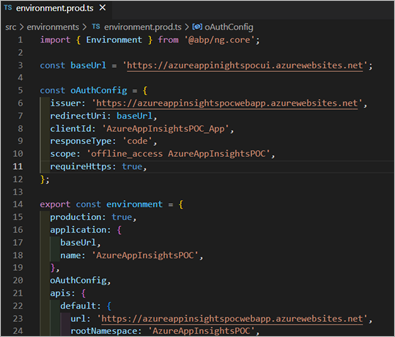
Expand environments folder. You will see environment.prod.ts file and environment.ts file

Now like we did changes in your appsettings.json file for publishing backend application we need to do changes in these to file.
Double click on environment.prod.ts and open it replace baseUrl link with url of your UI web app service
And same for the Isssuer and url inside Default. paste backend web app service url with these two.
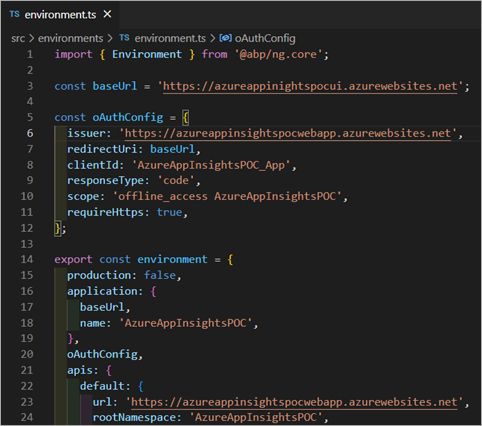
Follow same steps for environment.ts file
Now right click on Terminal and select new terminal option
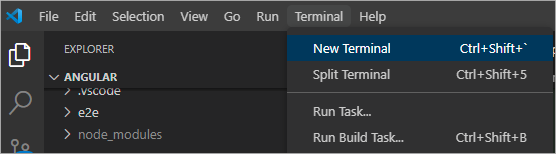
This will open your terminal in main folder path as follow.
PS D:\ABP.IO\AzureAppInsightsPOC\angular
Now paste the following command in your terminal.
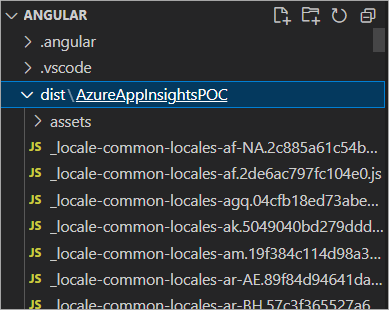
ng build --prod

Press Enter.
This command will generate dist folder in your project. Which we need to publish your angular application to your azure app service.
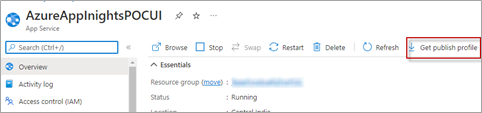
Now go to your web Ap service which we created to publish angular app.
If you haven’t downloaded your Publish profile of uI app service, then download it as shown below.
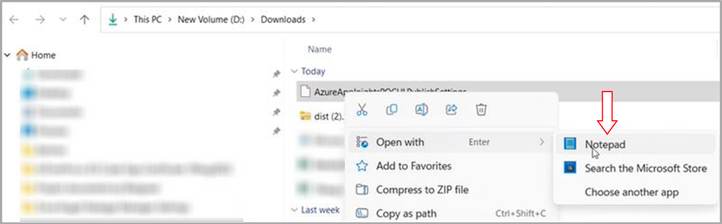
Now open This file with Notepad.

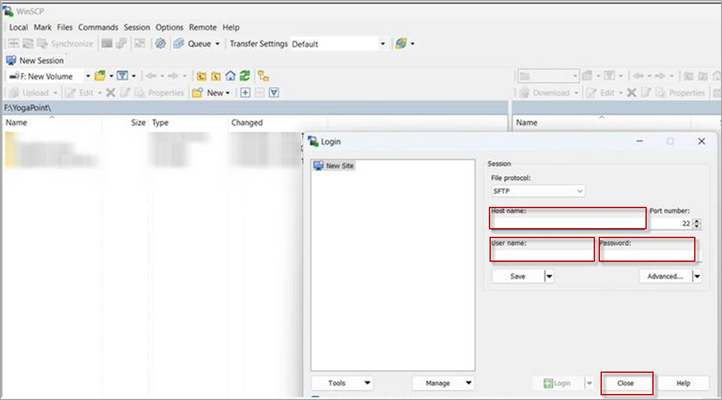
Now for the next step you need the WinSCP application. Open your WinSCP application and paste your publish Url,

Username

Password in your WinSCP login profile.
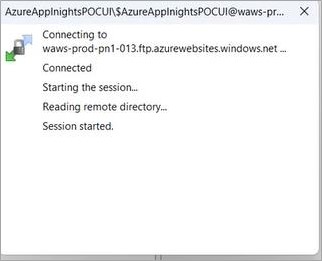
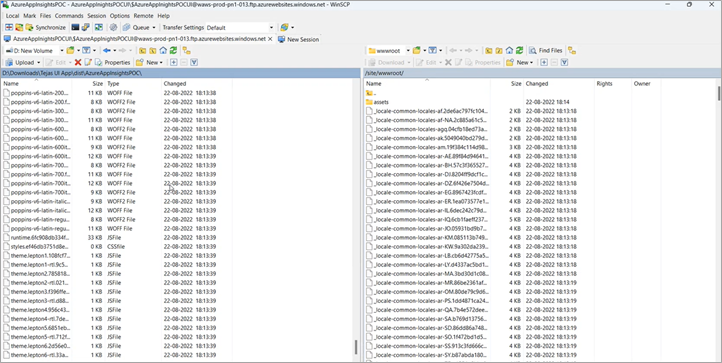
Here now we are connected to Http. On right side there is your cloud container and on the left side is your local machine
Now go inside your local machine = go to downloads. There you will find your Zipped dist folder.
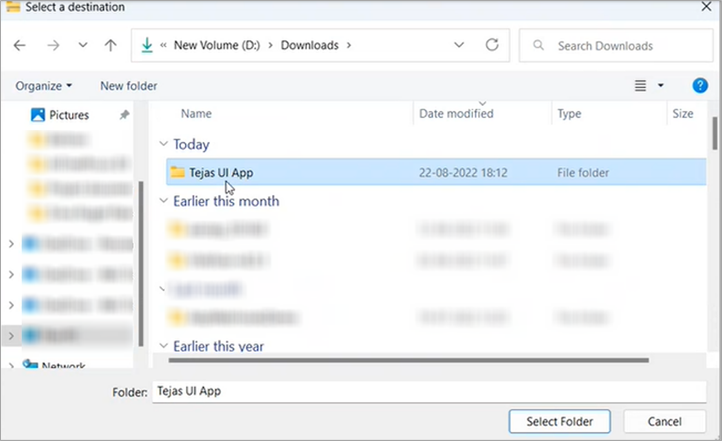
Now create a new folder to extract the zip file of your dist file.
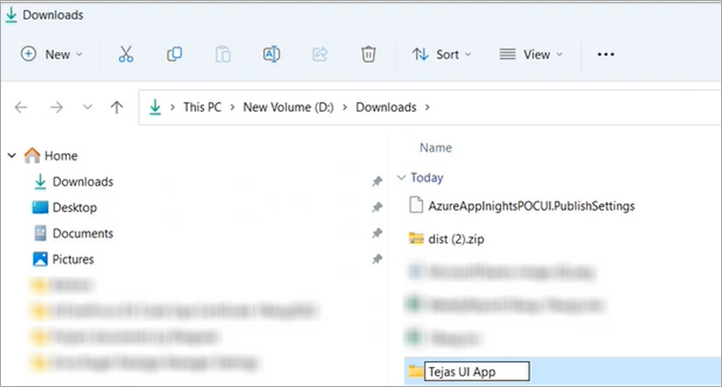
Now right click on your dist zip file choose the extract all option. Select the folder path which we created earlier to Extract the file.
Click on select Folder (your file will get extracted).
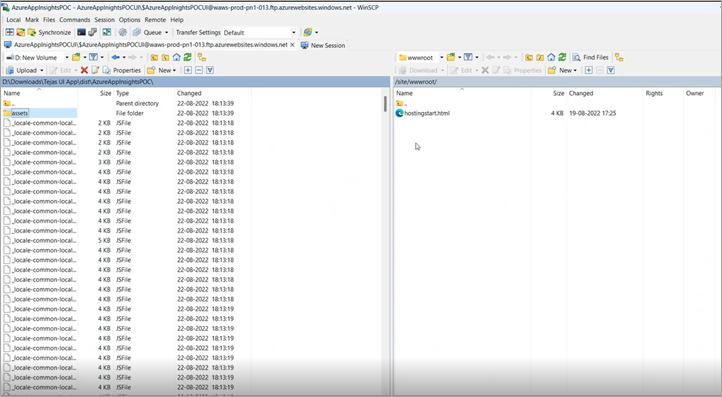
Now open this folder from WinSCP
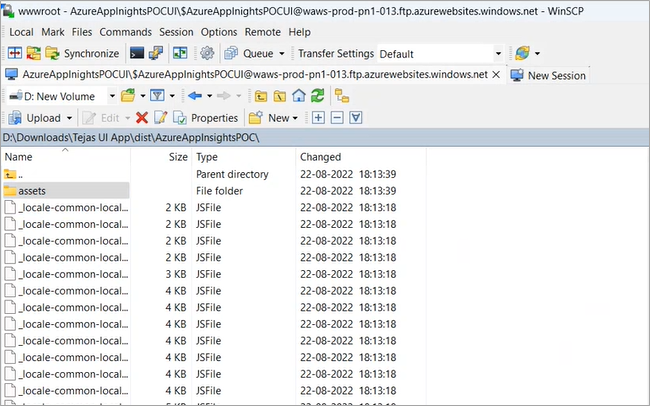
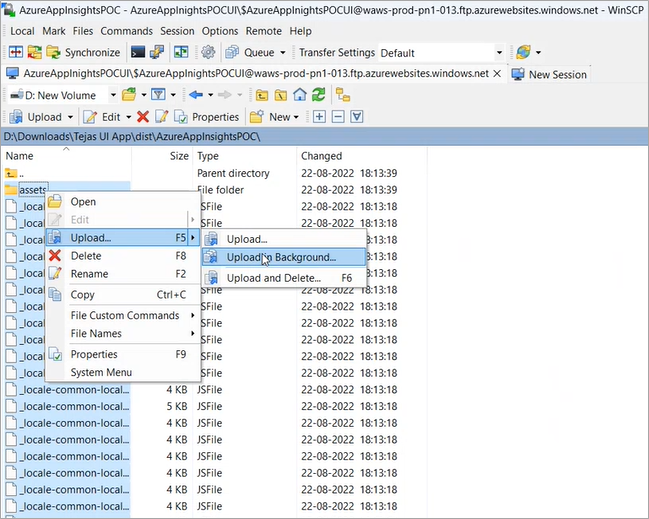
Now select all those files and click on upload
Click on “ok”.
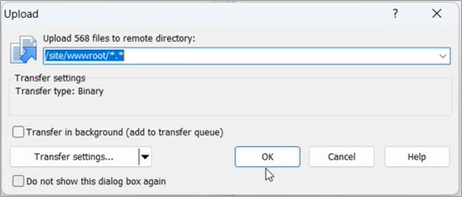
Wait Till your all files get uploaded. It may take some time.
After completing the upload your screen will look like this.
Your Deployment is Done.
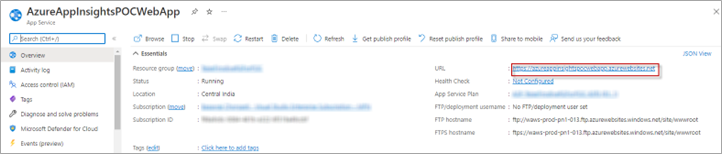
Now go to your resource group and open the UI app service.
Copy UI app URL and paste it into your browser.
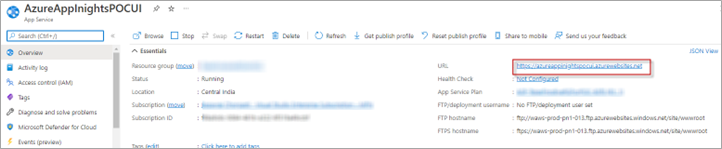
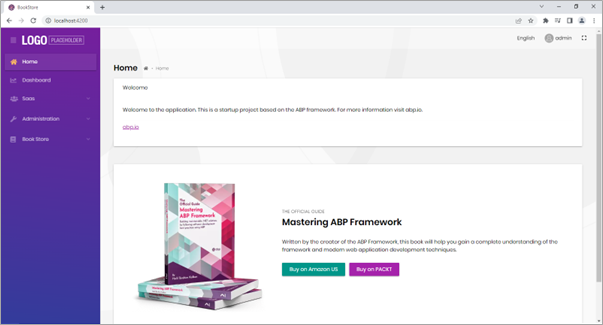
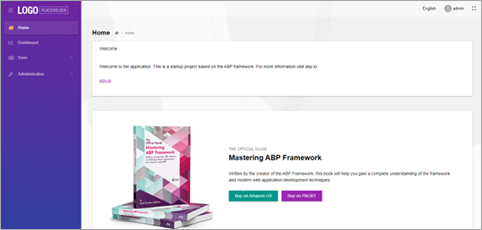
if you are able to see the Home page of your application then Congratulations it’s done….
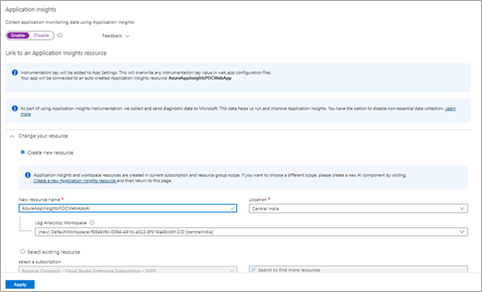
Now Final task is to enable application insights of your freshly created application.
Enabling Azure Application Insights
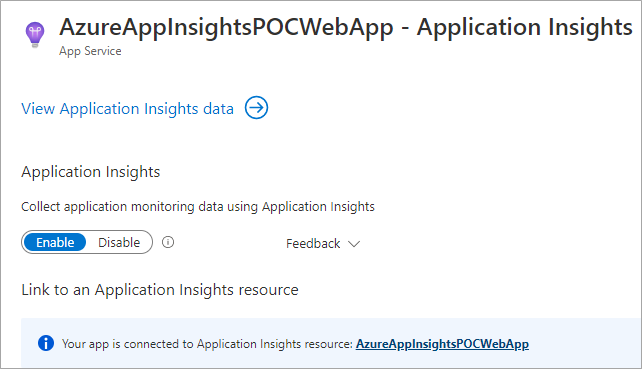
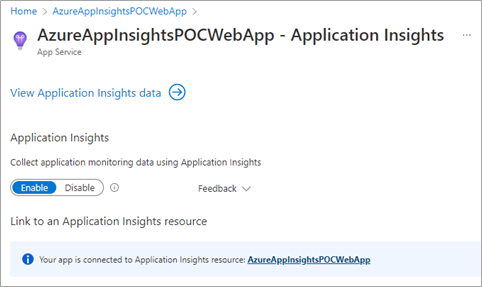
Now go to your web app service (Make sure you are in your backend app service, not the UI one)
Click on Application insights
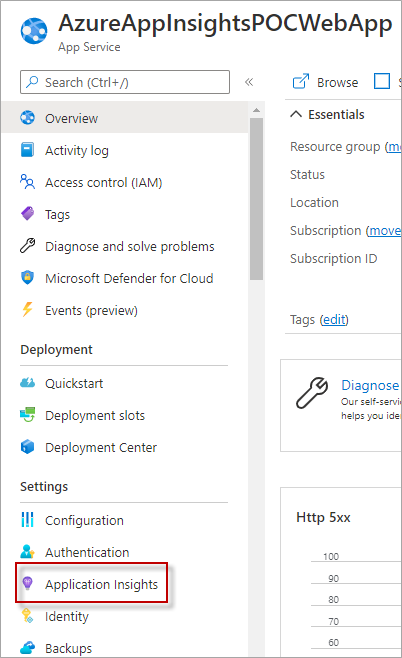
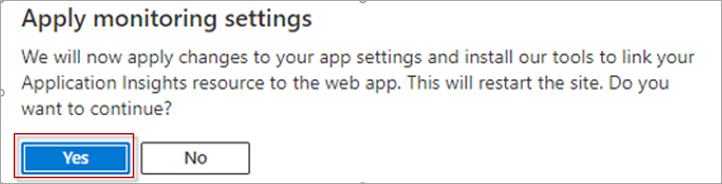
It will render your application insights page
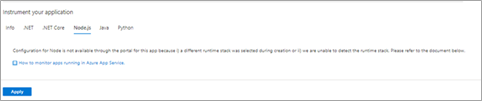
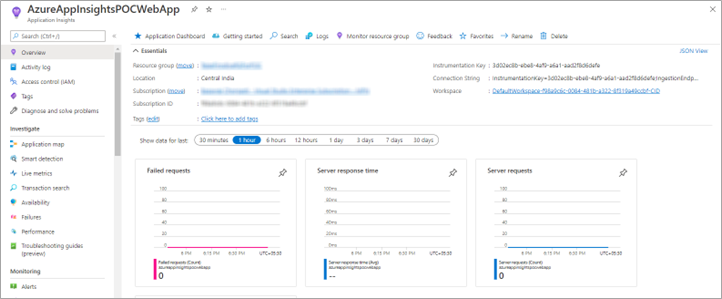
How Application Insights works
Application Insights inserts a small package to your application and set up the Application Insights resource within Azure, thus sending the data to Azure to collect information. Your web application is monitored, and it sends telemetry data to the Insight portal (the portal itself is Azure, but the application can be pretty much anywhere – cloud or on-premises).
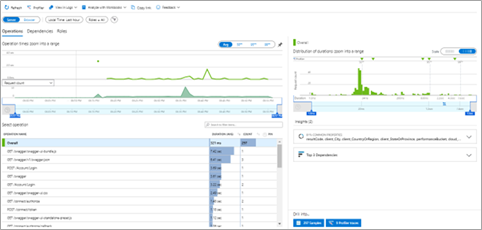
What data you can collect with Application Insights
- The most popular webpages in your application, at what time of day and where is that traffic coming from?
- Dependency rates or response times and failure rates to find out if there’s an external service that’s causing performance issues on your app.
- Exceptions for both server and browser information, as well as page views and 5load performance from the end users’ side.
- Session info – who, what, when, where.
- Performance and host diagnostics – giving you a complete picture of what’s happening in your application.
- Trace logs for correlating trace events with requests to help you get a deeper insight into the data and dig deeper into the diagnostics to improve performance.
Featured Comments
Lorem ipsum dolor sit amet, consectetur adipiscing elit, sed do eiusmod tempor
Lorem ipsum dolor sit amet, consectetur adipiscing elit, sed do eiusmod tempor
Lorem ipsum dolor sit amet, consectetur adipiscing elit, sed do eiusmod tempor
More Articles from Kirti Kulkarni

With over 20 years of experience in software development, Kirti heads Product R&D and Competency Management at WAi Technologies, leading the training and skills upgradation program at WAi. Kirti introduced the 'Women Back To Work' Initiative that encourages women to return back to mainstream software development after a career break or sabbatical.